
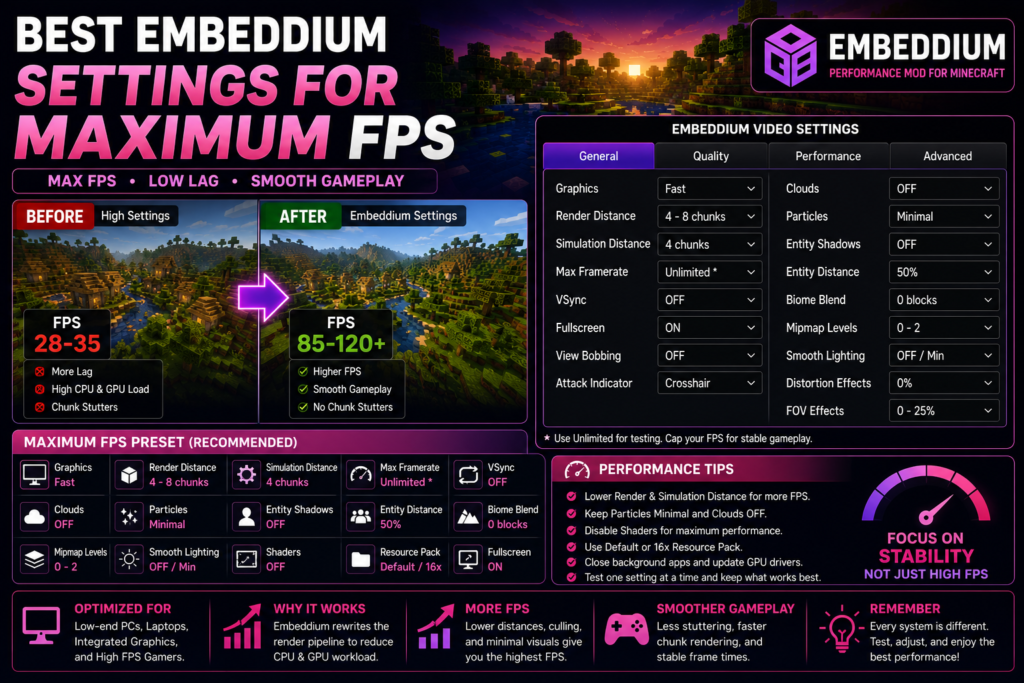
Using the best Embeddium settings for maximum FPS means reducing unnecessary rendering work while keeping the game clear and playable. The biggest improvements normally come from render distance, simulation distance, graphics quality, particles, clouds, entity rendering, shaders, resource packs, and frame-rate controls.
Embeddium is a free and open-source client performance mod based on Sodium 0.5.8. Its official project describes a rewritten terrain renderer, optimizations for entities, graphical interfaces, block entities, and additional compatibility improvements. Embeddium is client-side and is available across supported Forge, Fabric, and NeoForge combinations, depending on the selected Minecraft version.
Quick Maximum FPS Preset
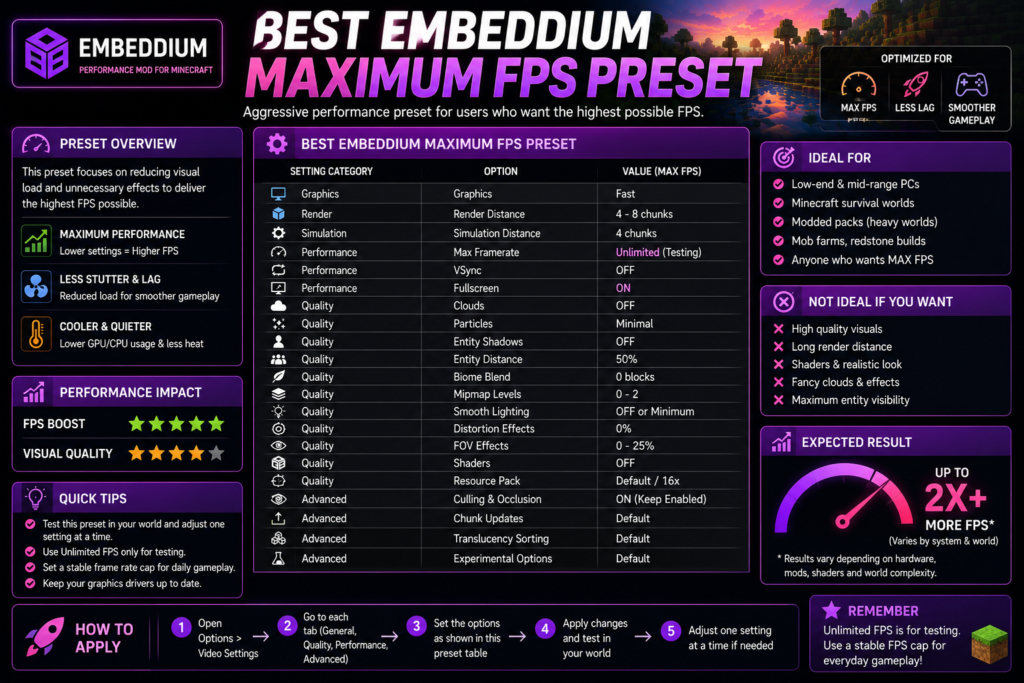
Start with the following aggressive performance preset:
| Setting | Maximum FPS value |
|---|---|
| Graphics | Fast |
| Render Distance | 4–8 chunks |
| Simulation Distance | 4 chunks |
| Maximum Frame Rate | Unlimited for testing |
| VSync | Off |
| Fullscreen | On, then compare |
| Clouds | Off |
| Particles | Minimal |
| Entity Shadows | Off |
| Entity Distance | 50% |
| Biome Blend | 0 blocks |
| Mipmap Levels | 0–2 |
| Smooth Lighting | Off or Minimum |
| Distortion Effects | 0% |
| FOV Effects | 0–25% |
| Shaders | Off |
| Resource Pack | Default 16x |
| Culling and occlusion | Enabled where available |
| Chunk-update options | Default |
| Experimental options | Default |
| Translucency Sorting | Default unless required |
This is a starting configuration, not a guaranteed FPS result. Every computer responds differently depending on the processor, graphics card, available memory, thermal limits, drivers, Minecraft version, world complexity, installed mods, shaders, and resource packs.
Maximum FPS vs Stable Gameplay
There are two different goals:
Maximum benchmark FPS
Use:
Maximum Frame Rate: Unlimited
VSync: Off
This removes the frame-rate cap and helps measure how many frames the computer can generate.
Smooth everyday gameplay
After testing, set the frame limit to a number your computer can maintain consistently:
| Typical performance | Recommended limit |
|---|---|
| 30–45 FPS | 30 or 40 FPS |
| 45–60 FPS | 45 or 60 FPS |
| 60–90 FPS | 60 or 75 FPS |
| 90–144 FPS | Match monitor refresh rate |
A stable frame rate normally feels smoother than a higher number that constantly rises and falls. Unlimited FPS may also increase heat, fan noise, power consumption, and hardware usage.
Before Applying the Settings
Complete these checks first:
- Confirm that Embeddium is installed correctly.
- Launch the correct Forge, Fabric, or NeoForge profile.
- Keep only one Embeddium version installed.
- Remove overlapping rendering mods.
- Update the graphics driver.
- Disable shaders for the first test.
- Return to the default resource pack.
- Test in the same world and location.
Embeddium’s official project page identifies it as a client-side performance mod. Therefore, these settings can improve local rendering performance, but they cannot directly repair server TPS problems, network latency, or a slow multiplayer server.
Some older official Embeddium releases explicitly list Rubidium and certain alternative settings-menu mods as incompatible. Always review the compatibility notes for the exact release you installed rather than assuming every addon works with every version.
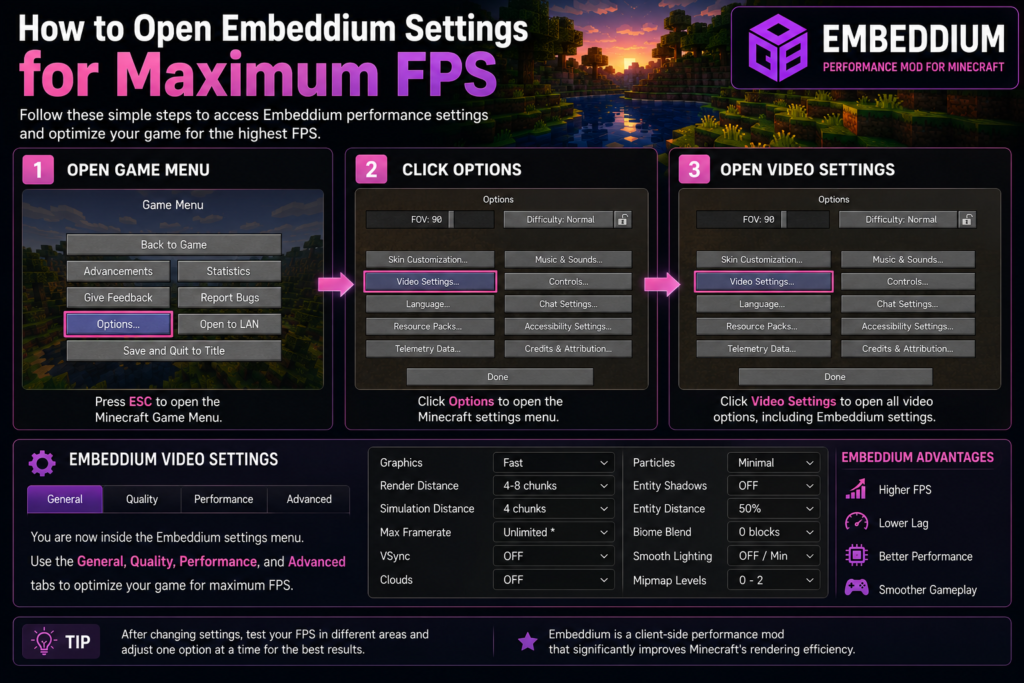
How to Open Embeddium Settings
Launch Minecraft with Embeddium installed, then open:
Options → Video Settings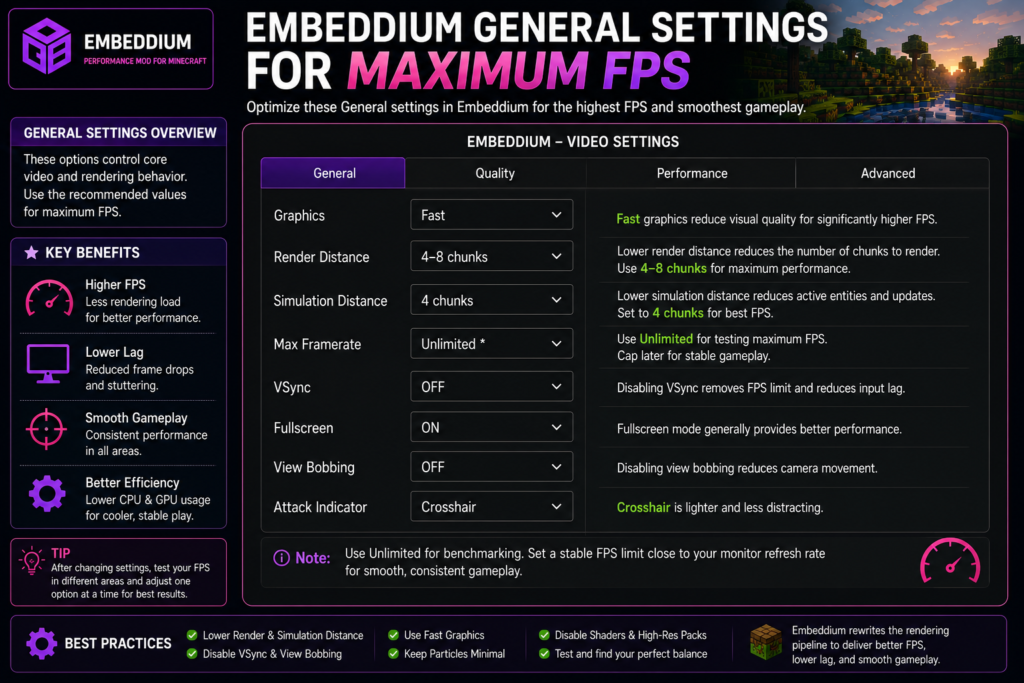
Depending on the Minecraft and Embeddium version, options may be divided into tabs such as:
- General
- Quality
- Performance
- Advanced
The exact names and locations may vary. Use the closest equivalent option available in your installation.
Best General Settings for Maximum FPS
Graphics: Fast
Set:
Graphics: Fast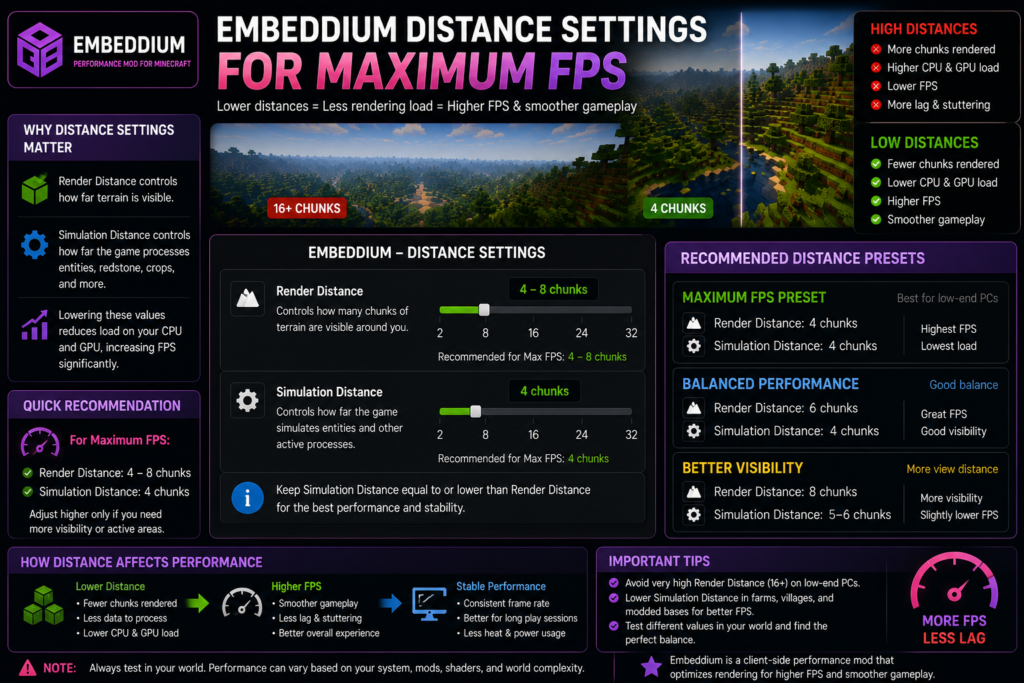
Fast graphics reduce visual details that require additional rendering. This is one of the easiest settings to change when targeting maximum performance.
Fancy graphics can be restored later when your FPS remains comfortably above the desired target.
Render Distance: 4–8 Chunks
For the highest FPS, start with:
Render Distance: 4 chunksFor a better balance between visibility and performance, use:
Render Distance: 6–8 chunksRender distance determines how much terrain is visible around the player. More visible chunks require additional terrain processing, memory, and graphics work.
Suggested ranges:
| Goal | Render distance |
|---|---|
| Maximum possible FPS | 4 chunks |
| Very high FPS | 6 chunks |
| Performance and visibility balance | 8 chunks |
| Better visuals | 10–12 chunks |
Avoid 16, 24, or 32 chunks when maximum FPS is the main goal.
Simulation Distance: 4 Chunks
Use:
Simulation Distance: 4 chunksSimulation distance controls how far away many active game processes continue running, including entities, crops, redstone systems, and other world activity.
Lowering it can help in locations containing:
- Villagers
- Animal farms
- Redstone systems
- Mob farms
- Dropped items
- Large modded machines
Keep simulation distance equal to or lower than render distance.
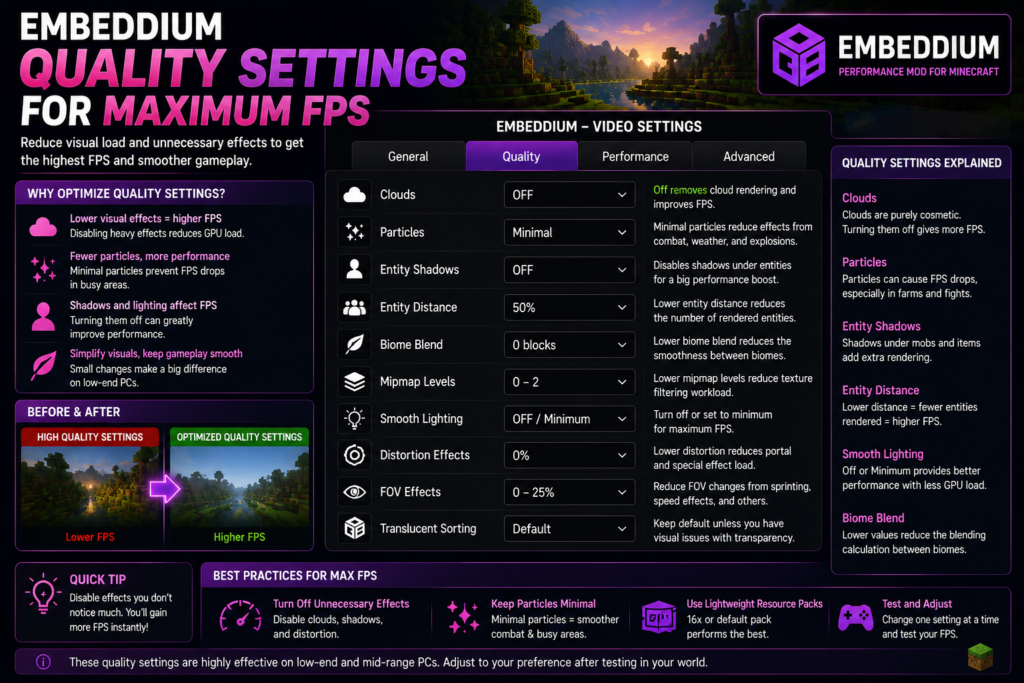
Maximum Frame Rate: Unlimited for Testing
Set:
Maximum Frame Rate: UnlimitedUse this only when measuring maximum FPS.
Once testing is finished, apply a stable limit close to your monitor refresh rate or the frame rate your computer can maintain.
VSync: Off
Set:
VSync: OffVSync can reduce screen tearing, but it can also limit frame output and may introduce additional input delay.
For maximum FPS testing, keep it disabled. Afterward, compare VSync On and Off and keep the setting that feels smoother during normal gameplay.
Fullscreen: Test On and Off
Start with:
Fullscreen: OnFullscreen may perform better on some systems, but results vary depending on Windows, the GPU driver, resolution, and display configuration.
Test the same location in:
- Fullscreen
- Windowed mode
- Borderless mode, when available
Keep the option that produces the most stable results.
Best Quality Settings for Maximum FPS
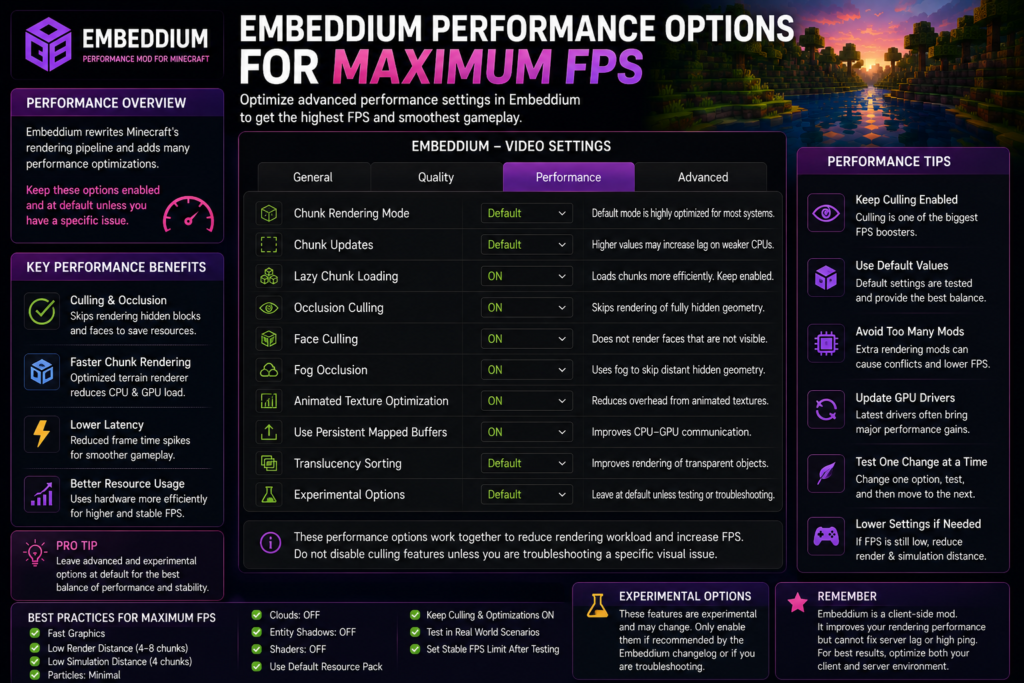
Disable unnecessary visual effects and lower quality options to reduce GPU workload.Clouds: Off
Set:
Clouds: OffClouds are optional visual elements and can be disabled without affecting Minecraft gameplay.
Particles: Minimal
Set:
Particles: MinimalParticles appear during combat, explosions, potion effects, portals, weather, block breaking, and many modded effects.
Minimal particles can reduce visual load in busy areas.
Entity Shadows: Off
Set:
Entity Shadows: OffThis removes the small shadows displayed below mobs and other entities.
The change is especially useful in:
- Villages
- Trading halls
- Animal farms
- Mob farms
- Multiplayer hubs
Smooth Lighting: Off or Minimum
For maximum FPS:
Smooth Lighting: OffFor slightly better visuals:
Smooth Lighting: MinimumTurning smooth lighting off can make blocks appear flatter, so Minimum may provide a better visual balance on systems that already run well.
Biome Blend: 0 Blocks
Set:
Biome Blend: 0 blocksBiome blending smooths color transitions between nearby biomes. Setting it to zero reduces that additional visual processing.
Mipmap Levels: 0–2
For maximum performance:
Mipmap Levels: 0For clearer distant textures:
Mipmap Levels: 2Lower values may make distant textures look rougher but can reduce texture-filtering work.
Entity Distance: 50%
Set:
Entity Distance: 50%This reduces the distance at which mobs, animals, dropped items, and some other entities are displayed.
For a more balanced preset, increase it to:
Entity Distance: 75%Distortion Effects: 0%
Set:
Distortion Effects: 0%This reduces portal, nausea, and similar screen-distortion effects.
FOV Effects: 0–25%
Use:
FOV Effects: 0–25%This limits field-of-view changes caused by sprinting, flying, speed effects, and similar movement.
Shaders: Off
Keep shaders disabled when maximum FPS is the goal.
Shader packs may add:
- Dynamic shadows
- Reflections
- Volumetric lighting
- Improved water
- Post-processing
- Advanced atmospheric effects
These effects can significantly increase GPU workload.
Resource Pack: Default or 16x
Use the default Minecraft textures or a lightweight 16x resource pack.
Avoid:
- 64x packs
- 128x packs
- 256x packs
- 512x packs
- Animated high-resolution packs
- Shader-dependent packs
Best Embeddium Performance Options
Embeddium contains terrain-rendering and immediate-mode rendering optimizations. Its project documentation also lists optional translucency sorting and compatibility-focused fixes.
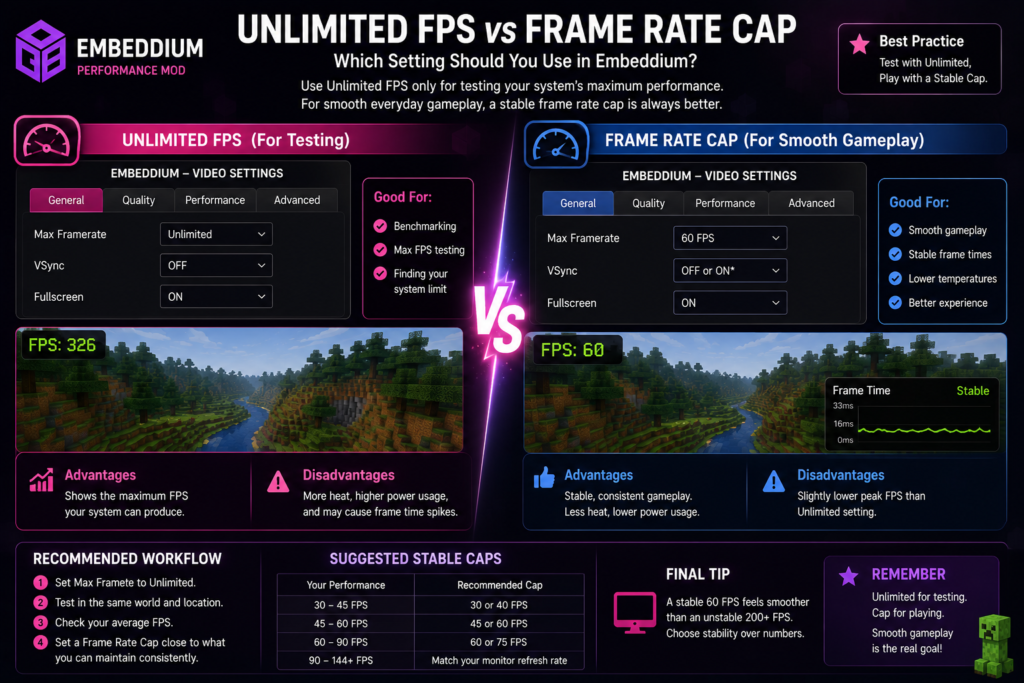
Keep Culling Enabled
Where available, keep these types of options enabled:
- Terrain or chunk culling
- Block-face culling
- Fog occlusion
- Hidden-face removal
- Animated-texture optimization
Culling avoids rendering surfaces that cannot normally be seen.
Do not disable culling simply because the option sounds aggressive. Disable one option only when investigating a specific visual problem.
An Embeddium issue discussion shows block-face culling being suggested as an individual troubleshooting test for visual glitches, not as a universal performance setting to disable.
Chunk Updates: Default
Keep chunk-update settings at:
DefaultIncreasing chunk-update activity can make newly changed terrain appear sooner, but it may create frame-time spikes on weaker processors.
Use aggressive chunk-update settings only after testing them in the same world.
Translucency Sorting: Default
Keep translucency sorting at its default value unless you experience problems with:
- Water
- Glass
- Stained glass
- Transparent blocks
- Modded translucent materials
Embeddium officially describes translucency sorting as optional and available through Video Settings.
Experimental Options: Default
Leave experimental options unchanged unless:
- The official release notes recommend a change
- A specific mod requires it
- You are troubleshooting a confirmed problem
- You can easily restore the previous value
Changing several experimental options together can create visual glitches or make the cause of a problem difficult to identify.
Maximum FPS Presets by System Level
Preset 1: Very Weak PC
Suitable for older laptops, weak integrated graphics, or systems with limited cooling.
| Setting | Value |
|---|---|
| Graphics | Fast |
| Render Distance | 4 chunks |
| Simulation Distance | 4 chunks |
| Max Frame Rate | Unlimited for test |
| VSync | Off |
| Clouds | Off |
| Particles | Minimal |
| Smooth Lighting | Off |
| Entity Shadows | Off |
| Entity Distance | 50% |
| Biome Blend | 0 |
| Mipmap Levels | 0 |
| Shaders | Off |
| Resource Pack | Default |
Preset 2: Maximum FPS Balanced
Suitable for most integrated graphics and entry-level computers.
| Setting | Value |
|---|---|
| Graphics | Fast |
| Render Distance | 6 chunks |
| Simulation Distance | 4 chunks |
| Max Frame Rate | Unlimited for test |
| VSync | Off |
| Clouds | Off |
| Particles | Minimal |
| Smooth Lighting | Minimum |
| Entity Shadows | Off |
| Entity Distance | 50–75% |
| Biome Blend | 0 |
| Mipmap Levels | 2 |
| Shaders | Off |
| Resource Pack | Default or 16x |
Preset 3: High FPS with Better Visibility
Suitable for lower mid-range computers.
| Setting | Value |
|---|---|
| Graphics | Fast |
| Render Distance | 8 chunks |
| Simulation Distance | 5 chunks |
| Max Frame Rate | Match monitor after testing |
| VSync | Test both |
| Clouds | Off |
| Particles | Minimal |
| Smooth Lighting | Minimum |
| Entity Shadows | Off |
| Entity Distance | 75% |
| Biome Blend | 2 |
| Mipmap Levels | 2 |
| Shaders | Off |
Settings to Avoid
Avoid combining these options when maximum FPS is the priority:
- Fancy graphics
- High render distance
- High simulation distance
- Fancy clouds
- All particles
- Maximum entity distance
- Large biome blend
- Maximum smooth lighting
- High-resolution resource packs
- Shader packs
- Several overlapping rendering mods
- Continuous recording or overlays
- Excessive experimental settings
One demanding setting may be manageable, but several enabled together can lower FPS and increase stuttering.
System Optimizations for More FPS
Update the GPU Driver
Install drivers through the official software provided by:
- Intel
- AMD
- NVIDIA
Avoid unofficial driver-download websites.
Use the Dedicated GPU
On a laptop with integrated and dedicated graphics, ensure that Minecraft’s Java executable uses the high-performance GPU.
In Windows:
Settings
→ System
→ Display
→ Graphics
Select the Java executable used by Minecraft and choose:
High PerformanceClose Background Applications
Close unnecessary programs before launching Minecraft:
- Browsers with many tabs
- Video editors
- Screen recorders
- Extra game launchers
- Cloud-sync tools
- Unused overlays
- Background downloads
Disable Shaders and Heavy Resource Packs
Test Embeddium using the default Minecraft appearance first.
Add visual modifications one at a time after the game reaches the desired performance level.
Avoid Excessive RAM Allocation
Allocating more memory does not automatically increase FPS. Do not assign nearly all system memory to Minecraft because Windows and background services also require RAM.
Use the amount recommended for your Minecraft version and modpack, then adjust only when memory usage shows that more is necessary.
How to Test the Maximum FPS Preset
Use a repeatable testing method.
- Open the same world.
- Stand in the same location.
- Face the same direction.
- Wait until nearby chunks finish loading.
- Record the FPS range.
- Walk through the same route.
- Change one setting.
- Repeat the test.
Test in several environments:
- Open terrain
- Dense forest
- Village
- Mob-heavy farm
- Large modded base
- Nether area
Do not compare two different worlds or locations because the rendering workload may be very different.
Measure More Than Peak FPS
Record:
- Average FPS
- Lowest noticeable FPS
- Stuttering
- Chunk-loading pauses
- Input responsiveness
- Temperature and fan noise
A brief peak of 200 FPS is less useful when the game repeatedly drops below 40 FPS.
Fix Low FPS After Applying the Preset
Lower Render Distance
Change:
8 chunks → 6 chunksWhen necessary:
6 chunks → 4 chunksLower Simulation Distance
Change:
6 chunks → 4 chunksThis can help in entity-heavy or redstone-heavy worlds.
Disable Every Shader
Remove the active shader pack and test again.
Do not evaluate basic Embeddium performance while a demanding shader is enabled.
Restore the Default Resource Pack
High-resolution textures can use additional graphics memory and processing power.
Test with the default Minecraft resource pack.
Test Embeddium Alone
Temporarily remove unrelated mods and run a clean profile containing:
- Correct mod loader
- Embeddium
- Required dependencies only
Add other mods back gradually when performance improves.
Reset Embeddium Settings
When too many options have been changed:
- Close Minecraft.
- Back up the profile’s configuration folder.
- Locate the Embeddium configuration file.
- Rename the file instead of permanently deleting it.
- Launch Minecraft again.
- Apply the preset gradually.
Configuration filenames can differ between releases.
Check for Server Lag
Embeddium improves client rendering. It cannot directly fix:
- Low server TPS
- Slow internet
- High ping
- Server-side entity overload
- Delayed multiplayer block updates
The official project classifies Embeddium as client-side.
Frequently Asked Questions
What are the best Embeddium settings for maximum FPS?
Use Fast graphics, four to eight chunks of render distance, four chunks of simulation distance, minimal particles, disabled clouds and entity shadows, zero biome blend, reduced entity distance, no shaders, and the default resource pack.
Should maximum frame rate be unlimited?
Use Unlimited only when measuring maximum FPS. For normal gameplay, set a limit your computer can maintain consistently or match your monitor’s refresh rate.
Should VSync be turned off?
Turn VSync off for maximum FPS testing. During normal gameplay, compare it with VSync enabled and keep whichever option provides smoother motion and acceptable input response.
Which render distance gives the highest FPS?
Four chunks normally create less terrain workload than higher values. Six to eight chunks provide a more practical balance between visibility and performance.
Does lowering simulation distance improve FPS?
It can reduce CPU workload in worlds containing active entities, villagers, farms, redstone systems, or modded machines. Use four chunks as a performance-focused starting point.
Should smooth lighting be disabled?
Disable it for the most aggressive FPS preset. Use Minimum when you prefer better-looking lighting with a smaller performance compromise.
Should translucency sorting be enabled?
Leave it at the default unless transparent blocks, water, glass, or a compatible mod requires it. Embeddium lists translucency sorting as an optional feature.
Can I use shaders with the maximum FPS preset?
Shaders work against the goal of maximum FPS because they add substantial graphics work. Establish stable performance without shaders before testing a lightweight shader pack.
Does Embeddium increase FPS on every computer?
No fixed improvement is guaranteed. Results depend on hardware, drivers, game settings, Minecraft version, other mods, resource packs, shaders, and the loaded world.
Can Embeddium fix multiplayer server lag?
Embeddium can improve client rendering but cannot directly fix server TPS, ping, network delays, or server-side processing problems because it is a client-side mod.
Should I install Rubidium with Embeddium?
Do not combine them. Multiple official Embeddium release pages list Rubidium as incompatible.
Why is FPS high but Minecraft still stutters?
Possible causes include chunk generation, unstable frame times, background applications, thermal throttling, graphics-driver issues, mod conflicts, storage speed, or an unrealistic unlimited frame-rate target.
Conclusion
Best Embeddium Settings for Maximum FPS use Fast graphics, low render and simulation distances, disabled clouds and entity shadows, minimal particles, zero biome blending, reduced entity distance, no shaders, and a lightweight resource pack.
Use Unlimited FPS only for benchmarking. After testing, apply a realistic frame cap that produces stable movement and acceptable temperatures. Change one option at a time and compare results in the same world location.